Versioning your Portal with ADO

Hi folks, In this post, I will guide you step by step on how you can version your Portal with Azure DevOps.
Before starting...
To do this practice, we will use the following:
- Azure DevOps
- A Power Portal 👀
- Visual Studio Code
- Git installed on your computer
Let's get Started!
Step 1 Create your Project in Azure DevOps

Step 2 Initialize your repository.

Step 3 Clone your repository with VS Code.


Step 4 Select the directory where the project will be saved and Sign In.

Step 5 Install Power Platform tools on Visual Studio Code.

Step 6 Open a new terminal in Visual Studio Code

Step 7 To download the Portal data on your VS Project, you must first authenticate on the environment. Execute the following command line to establish on your VS terminal. pac auth create -u [CRM URL]

Step 8 A pop-up window will display; sign in with your environment credentials.

Step 9 Execute the following command to see all websites available in your environment and then copy the GUID of the site you want to download pac paportal list

Step 10 Download the Portal data using the next line on the terminal
pac paportal download --path / -id [Website Id]

You will find on your left all portal data downloaded.

Step 11 Go to the Branch icon on the left menu and name the project

Step 12 On the commit button, click on the arrow to see more options and select commit and push.

You will see when this is pushed on the bottom bar.
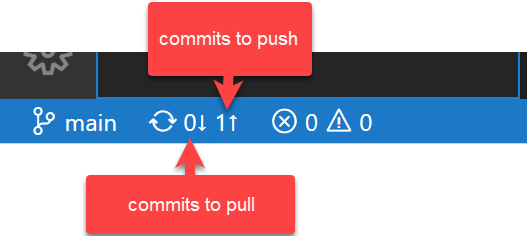

When no more commits are pending to push, you can confirm on ADO Repo the Portal data pushed.

Comments
Post a Comment